Grab Documents With OutWit Hub
In this tutorial we are going to learn how to download all the documents (.pdf, .doc, .xls,…) from a webpage with OutWit Hub.
Important Note: The tutorials you will find on this blog may become outdated with new versions of the program. We have now added a series of built-in tutorials in the application which are accessible from the Help menu.
You should run these to discover the Hub.
On some webpages, you can find links to different kinds of documents. Looking for each link would be really tiring: with OutWit Hub, you can automatically see all the links to documents, the name and extension of those, and download them to your hard-disk (also see OutWit Docs).
1. Launch OutWit Hub
If you haven’t installed OutWit Hub yet, please refer to the Getting Started with OutWit Hub tutorial.
Begin by launching OutWit Hub from Firefox. Open Firefox then click on the OutWit Button ![]() in the toolbar.
in the toolbar.
If the icon is not visible go to the menu bar and select Tools -> OutWit -> OutWit Hub
OutWit Hub will open displaying the Web page currently loaded on Firefox.
2. Go to the Desired Web Page
In the address bar, type the URL of the Website. You can also type any string to search and OutWit Hub will look for it using the preferred search engine selected in Firefox.
![]()
We’ll use the United States’ wikipedia article: http://en.wikipedia.org/wiki/United_states
Go to the Page view where you can see that OutWit Hub displays the Web page as it would appear in a traditional browser.
Now, select “Links” from the view list.

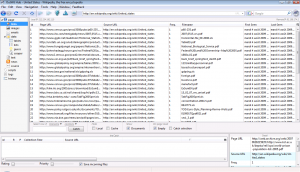
In the “Links” widget, OutWit Hub displays all the links from the current page and allows you to sort them. Check the “Documents” box from the filter controls.
![]()
If the “Links” view is blank, reload  the page.
Checking the Documents box from the “Links” view allows you to see all the documents from the webpage.
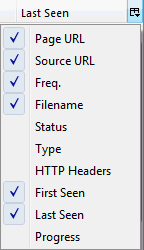
If you want to have more information about the documents, you can hit the “Pick a Column” button to show or hide columns with various precisions (HTTP headers, last seen on, filename, etc).
3. Select the documents you want
The data in the “Links” view can be edited, filtered, sorted and moved to the “Catch”.
Let’s sort the current documents in order to select the Excel spreadsheets.
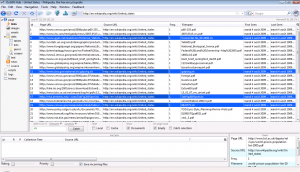
In the search tool of the filter controls, we can use the Select row if Filename contains “xls”.
The .xls documents are now highlighted. You can move them to the catch, you just have to hit
4. Save the documents you like
If you want to save the documents you have selected on your hard disk, check the “Save incoming files” in the Catch before catching them.
When hitting the Catch button, you will have to choose a destination folder on your hard-disk for the selected documents. Download time may vary depending on the number of documents and their size.
5. Application Examples
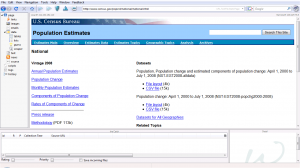
Documents are common in Web pages and simple to extract with OutWit Hub’s “Links” view. Let’s say you want to get statistics about US inhabitants. Open OutWit Hub and go to the American Census webpage.
In the “Links” view, check Show Documents and Catch Selection and uncheck Empty on page load. This way, each time a page will load, the “Links” widget will show the documents of the current page and catch them, but the documents of the previous pages will also be displayed.
![]()
In the Catch, check the Save Incoming files box so that each file that is catched will be saved onto your hard-disk.
Now click the Dig button![]() (depth:0) and take a rest: the hub will browse through all the links of the page for you to find the ones that link to documents and will directly save those into the selected directory.
(depth:0) and take a rest: the hub will browse through all the links of the page for you to find the ones that link to documents and will directly save those into the selected directory.
You can also train your automatic documents download skills on the Biomass database of the US department of energy here.
by jcc
Tags: document extraction, grab data, Outwit Hub


